Wednesday 25 July 2018

TherMe: QQ Homemade Fishballs with Only 3 Simple Ingredients

Credits to Sew Chin for perfecting & sharing this fantastic fishball recipe!!

Attempted the fishball recipe in 'Perfection with Thermomix in 7 Days' once but tweaked it slightly & the texture didn't turn out as gd as expected. Thus, I automatically assumed it could be due to the fact that I didn't follow the recipe exactly. However, a few other gfs tried it as well & they found it unsatisfactory too. After trying the ones done by Sew Chin, all of us fell in love with it so we decided to try it ourselves too ;)

Ingredients (1/2 portion):

250g fresh yellowtail fish meat, aka 豆腐鱼 in Cantonese (preferably bought the same day)
230g of water (90% of fish meat)
1.5 tsp pink Himalayan salt
A small bowl of salt water (to wet hands)
A big bowl of ice water
1200g of water

Directions:

1. Fillet the fish from the skeleton then scrape off all the flesh from the skin, in the direction towards the tail.


2. Put both the fish meat & 230g of water into mixing bowl. Blend for 20s / Speed 9 then scrape down the sides & repeat the process again (a total of 3x if preparing a full portion)


3. Next, knead for 30s / Dough Mode (increase to 1min for full portion). Transfer fish paste to a big bowl & set 1s / Turbo followed by 1s / Reverse / Turbo to spin out the residual paste for easy removal.

4. Add in salt to fish paste & mix in evenly till the watery paste curds (becomes harder to mix).


5. Wet both hands with salt water so fish paste won't stick as badly. Put some fish paste onto palm & make a fist. Next, use thumb to gently smoothen top part of paste then slowly squeeze the paste out into fishballs of desired size.

6. Dip a spoon into the salt water then use it to scoop out each fishball from hand before putting into the bowl of ice water to soak for at least 2.5-3 hours (depending on how salty u like them to be) for the extra salt to dissolve inside the water or else the fishballs will be too salty. 

Variation - u can also use the fish paste (without soaking) as fillings for beancurds, green / red chillies, lady fingers, tau pok etc to make your own yong tau foo. Note that while the paste might b a bit salty, we still find it palatable cos the saltiness is balanced by the 'hosts'. 

7. If you intend to store in the fridge overnight, discard
 the water used to soak the fishballs. Before cooking, add some water to separate the fishballs 1st.


8. Pour 1200g of water into mixing bowl, insert simmering basket then put on the lid to cook 10mins / 120°C / Spoon Speed.

9. Pour the fishballs (seperate into 2-3 batches) through the lid's hole then cook 10mins / 100°C / Speed 2 till they float. Actual cooking duration may vary slightly depending on the size of your fishballs so reduce or extend accordingly. Repeat for the remaining batches.

For non-Thermomix readers, you can still follow the steps & pictures to blend your fish using your normal blender but u may need to allow for additional blending time accordingly, depending on the power of your blender's motor. Then, u'll have to manually 'slam' the meat repeatedly (at least 60-70 times) to achieve the 'QQ' texture.

The texture of the fishballs are almost identical to that of their commercial counterparts but without all the additional flour / additives etc. Even my mum who does her own fishballs the tradtional way told me they're bouncy! One of the main reasons why I love my Thermomix is I'm able to do most of my food from scratch, just like how our grandparents / parents used to do, but in a more efficient & hassle-free way. 

Tuesday 10 July 2018

TherMe: Black Sesame 'Chiffon' Cake

Credits to Isabel for teaching this yummy cake during one of the meetings & my cooking kaki for her notes <3

Ingredients:

List A
100g black sesame
100g unbleached plain flour
100g yogurt
60g organic raw sugar
40g cooking oil
7 egg yolks
5g sesame oil
1 tsp baking powder

List B
70g organic raw sugar
7 egg whites
1/2 tsp cream of tartar (will personally prefer to replace with 1 tsp of lemon juice)

Directions:

1. Preheat oven to 160°C. Pour sesame into mixing bowl & grind 1min / Speed 10 (accidentally poured in the sesame oil too so blended both together..luckily it turned out alright..hee).


2. Add in remaining ingredients in List A then blend at 30s / Speed 6. Transfer to big bowl (skip this step if u've an extra mixing bowl).


3. Wash mixing bowl & dry thoroughly or use another mixing bowl if u've. Insert 'butterfly' whisk b4 putting List B's ingredients in to whip for 4mins / 37°C / Speed 4. Transfer to another big bowl.
(Note: added another 1min / Speed 4 to get a better whipped texture. Can try increasing 1/2 - 1min each time till u achieve stiff peaks if u prefer a fluffier chiffon)


4. Fold A's batter into B's egg white mixture in 3 batches & transfer to a chiffon tin.


5. Bake for 45mins or until a cake tester skewer or toothpick comes out clean when inserted in the centre of the cake. 

6. Invert the tin immediately on a cooling rack then let it cool completely. Remove tin, cut & serve.

For non-Thermomix readers, you can still follow the steps & pictures to grind the sesame using your normal blender & beat ur batter in a normal mixer but u may need to allow for additional preparation time accordingly.
(Note: Do check if ur blender is able to grind dry ingredients. If it can't, you may blend it together with the sesame oil but the sesame may not be ground as finely, depending on the power of ur blender.) 


Simply love the fragrant of this cake <3 Even though the texture differs slightly from normal chiffon cakes, the moistness of it more than compensates for that! 

Tuesday 26 June 2018

TherMe: Braised Pork Rice aka 卤肉饭

The famous Taiwan braised pork rice is one of my faves but those sold commercially tend to be a tad too oily leaving u feeling kinda jerlat towards the end. As a Thermomix advisor, we get to learn a new dish during our weekly meetings so u can imagine my excitement when we were told it's gonna b this dish for the week ;p

Ingredients:

700g of pork belly
Water
1 tsp of salt (preferably pink Himalayan salt / sea salt)
2-3 tbsps of dark soy sauce, depending on how dark u want it to be
1 tbsp of fermented bean paste
1 tbsp of light soy sauce
1 tbsp of organic raw sugar
1 tsp of sesame oil
3 cloves of garlic, ends cut away
10g organic extra virgin olive oil (EVOO)
6 dried shitake mushrooms, soaked, drained (retain the water) & sliced
150g of mushroom water
3 pieces of star anise

Directions:

1. Put pork into mixing bowl then add sufficient water to cover pork followed by salt. Par-boil for 20mins / 100°C / Reverse / Spoon Speed.

2. Remove pork then slice to desired thickness. Use a big bowl to marinate pork with dark soy sauce & mix well 1st so that colour will be more even. Add in the remaining seasonings (excluding water) & mix evenly.

3. Pour out the residual water in mixing bowl. Put garlic then set 5s / Reverse / Speed 5. Remove peels & scrap down sides before adding EVOO to sauté at 3mins / Varoma / Spoon Speed.

4. Fix butterfly onto blade then pour in marinated pork including the marinate, mushrooms, mushroom water & star anise & cook for 1hr 10mins / 98°C / Reverse / Spoon Speed

5. Lastly, add 5mins / Varoma / Spoon Speed to help thicken the sauce. Pour pork & gravy over cooked rice & hard-boiled egg. Best served warm with some steamed vegetables.

The braised pork can be prepared in advance then stored in individual portions either in chiller (overnight) or freezer (if more than 1 day). Simply cook rice in simmering basket with eggs on top while steaming the required pork portions in the Varoma dish as well as vegs on the Varoma tray & Voila! A quick meal ready in no time at all ~.<

For non-Thermomix readers, you can still tweak & follow the steps but simmer over low heat in a wok or pot on the stove. Stir occasionally but when sauce has thickened, stir more frequently to prevent it from getting burnt.


I'm glad e dish turned out not oily. Meat was well-flavoured & texture was perfect, tender yet not too soft..one word to sum it up, marvelicious!!

Friday 1 June 2018

TherMe: Pasta with Home-made Tomato Sauce

Adapted from the Tomato Sauce recipe in 'Thermomix The Basic Cook Book'

I've cooked the original tomato sauce as a base for pizzas numerous times & its delish! Was making another batch so decided to prep extra for our pasta dinner.

Ingredients (serves 1 toddler + 2 adults):

150g onions, peeled & halved
1 clove of garlic
60g of organic extra virgin olive oil (EVOO)
1kg of fresh cherry tomatoes
1 1/4 tsp of dried basil 
1 1/4 tsp of organic raw sugar
1/2 tsp of pink Himalayan salt
250g of minced pork
150g (pre-cooked) of desired pasta, cooked to al-dente then rinse lightly with room temp water
50g of frozen organic peas

Directions:

1. Add in onions, garlic & EVOO into Thermomix mixing bowl then chop 5s / Speed 5 followed by sauté 7mins / 120°C / Speed 1.

2. Add tomatoes, basil, sugar & salt then chop 15s / Speed 5.

3. Cook 30mins / 100°C / Speed 2. Keep half for future usage (base for pizzas, vegs etc).

4. Pour in minced pork, cooked pasta & peas then cook 3mins / 100°C / Reverse / Speed 1.

For non-Thermomix readers, you can still tweak the prepaprtions by either chopping the ingredients manually or using a normal blender. Follow the steps but simmer over low heat in a wok or pot on the stove. Stir occasionally & when sauce has thickened, stir more frequently to prevent it from getting burnt.


It's been awhile since I cooked tomato-based pasta for BB so he kinda finished his portion in record time..lolz! A keeper for sure <3 

Before having my TherMe, I used to prep the pasta sauce in my Avent Steamer & Blender. Due to size constraints, I'm unable to do larger quantities. Furthermore, this definitely tastes more fragrant due to the sautéing of ingredients as compared to just plain steaming.

TherMe: Kid-friendly Char Siew (Non-Baked Version)

This recipe was highly recommended by one of my cooking chums but I adapted it to be more kid-friendly for my boy.

Ingredients:

650g of pork belly
3 cloves of garlic
5 tbsps of brown sugar
2 tbsps of light soy sauce
1 tbsp of apple cider vinegar
1 tbsp of homemade peanut butter
3/4 tbsp of Simply Natural organic blk bean sauce (thick)
2 tsps of dark soy sauce
150g water (Note: can increase to 200g cos sauce abit thick)

Directions:

1. Chop garlic at 5s / Reverse / S5.

2. Marinate pork with all seasonings, except water, & place it in chiller for at least 4hrs.

3. Add marinated pork with sauce & water into Thermomix mixing bowl then cook for 45mins / 120°C / Reverse / Spoon Speed.

4. Slice to desired thickness, pour gravy over & serve warm.


For non-Thermomix readers, you can still follow the steps & simmer on low heat in a pot over the stove but u'll need to stir occasionally & when sauce has thickened, stir more frequently to prevent it from getting burnt.

As this is a non-baked version, you don't see the charred parts normally found on char siew which I feel makes it healthier actually. However, the meat is tender, flavourful & u can taste the fragrant of the roasted peanuts. It may not taste like its commercially-sold counterparts but both my parents enjoyed it tremendously & it definitely deserves the thumbs up given by my boy d(^.^)b

Best part of this is all that I need to do is put the marinated meat in, set the time, temperature & stirring speed & Thermomix will do its magic! No more watching of fire, stirring constantly to prevent burnts etc & I'm free to do anything while it's been cooked ~.<

Monday 11 December 2017

TherMe: Healthier Wholemeal Butter Cake

Adapted from Butter Cake recipe in 'Perfection with Thermomix in 7 Days'

The "blur sotong" me thought I still had an unopened pack of butter but when I checked the fridge, I realised I was wrong. As I was already all set to bake, I decided to still go ahead. I managed to do some Googling & DIY-ed my own self-raising flour too ~.<

Ingredients:

125g butter, softened (leave it at room temperature for 30mins) & cut into cubes
120g organic wholemeal flour
1 1/4 tsp baking powder
1/4 tsp pink salt
3 kampong eggs
80g organic raw sugar
25ml of fresh milk
1/4 tsp pure vanilla extract (double strength)

Directions:

1. Preheat oven to 170°C. Lightly grease & line a round tin with baking paper then set aside.

2. Mix flour, baking powder & salt together evenly.

3. Insert 'butterfly' whisk followed by butter & sugar into mixing bowl. Beat for 1.5min / S3.5.


4. Mix 40s / S3.5, adding vanilla extract, and one egg at a time & fresh milk thru the hole in the mixing bowl's lid onto the rotating blades to beat the mixture into a smooth batter.

5. Add flour mixture, mix 30s / S3.5 then transfer cake mixture into prepared cake tin. 


6. Bake in a pre-heated oven at 170°C for 20mins or until a cake tester skewer or toothpick comes out clean when inserted in the centre of the cake.


7. Allow to cool in cake tin for 10mins b4 transferring to a serving plate & cool completely. Cut & serve.


For non-Thermomix readers, you can still follow the steps & pictures to beat ur batter in a normal mixer but you may need to allow for additional preparation time accordingly.

This is my first bake using Thermomix & am loving it <3 It's so convenient with the in-built weighing scale & the batter only took less than 3mins to beat!!! Despite tweaking the original recipe, am glad it turned out successful, tasting as gd as it looks ^.^

Monday 12 June 2017

Cognitive Whizz's 'A Science Escapade'

School holidays are a whole lot fun for school-going kids but a BIG 'headache' for their parents as we have to squeeze our brain juices to plan lotsa fun or educational activities for them. How about a program which kills 2 birds with 1 stone? 

BB was one of the lucky few who received a sponsorship to 'A Science Escapade', organised by Cognitive Whizz at Brainfit Studio, Novena. It is a holiday program for kids between 4 to 7 years old which helps to nurture inquisitive minds & expose your child to Physical & Chemistry Science as they embark on an exciting journey through The Land of Fairy Tale Emergencies. What captivates me most is the integration of Science concepts in fairy tales <3 Through story-telling, role playing & experiments, kids will have tremendous fun interacting with their peers to unravel the mysteries of Science behind fairy tales!


The 4-day program is as follows:

Day 1 -> Accelerate Hansel & Gretel's escape through air, water & land
              - Appreciate Newton's laws of motion & effects of friction around us.
              - Understand energy conversion during propulsion.
              - Apply Physical Science concepts for the escape.

Day 2 -> Help Frog Prince float the heavy golden ball
              - Correlate densities with different types of balls & food items.
              - Be amazed by positive buoyancy as well as learn how heavy objects can float.
              - Apply concept of density in real life & how it benefits us.

Day 3 -> Revive Sleeping Beauty from her sleep
              - Understand why we yawn.
              - How to release trapped oxygen to her.
              - Appreciate the uses & significance of oxygen in our daily lives.

Day 4 -> Explore Aladdin's magic lamp for more surprises
              - Be a percussionist or wood-wind musician anytime.
              - Are your eyes tricking you? Be fascinated by optical illusions!
              - Discover the Science behind magic tricks relating to sound & light.

At the end of each session, there's actually a debrief for parents which I find it to be extremely useful. Upon finding out more about what the kids have learnt, we could actually help to revise & reinforce the Science concepts at home. Furthermore, teacher Denise even goes the extra mile to send us a text msg with an extremely detailed summary daily.

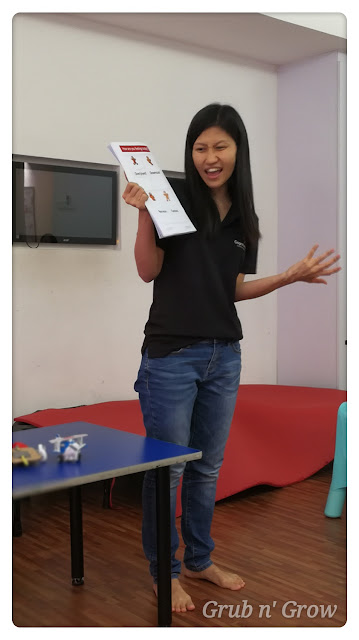
    Teacher Denise doing the parents' debrief on the 1st day.

    BB's creation to help Hansel & Greta escape from the wicked witch!

This is actually a non-parent accompanied program but I was a prilvieged few to be allowed to sit in. Here's some insights into what actually goes on in the classroom on the 2nd day. To be honest, I was totally blown away! The 3 hours program is packed full with not a dull moment at all.

The class commenced with a recap of yesterday's lesson which serves as a good revision. Kids were then introduced to 4 new vocabulary namely Embarrased, Discontented, Puzzled & Thrilled. After teacher Denise's explanation, all of them were given a chance to apply one of the words to the feelings they were experiencing that morning. BB said he was discontented as he didn't have breadfast that morning which left Mummy feeling puzzled as he definitely had his at home >_<


Next, story-time was on! All the kiddos crowded around & listened intently as Teacher Denise read The Frog Prince out loud to them. The kids love her animated narration <3


With reference to the golden ball in the story, physical balls of various shapes & sizes were introducted. The kids were then assigned to their respective groups according to their ages with an assistant teacher allocated to each table. Here on, they took turns to touch & have a feel of all the balls before completing the fun activities in their customised workbooks. Stickers were distributed to them & they were supposed to make a guess as to whether they'll float or sink in water. 


Upon completing this, the children were given turns to participate in the experiments whereby the actual results were demonstrated in the centre of the class. Well, seeing is always believing ;)


From the results revealed, the Science concept of density is borned. Different materials like aluminimum, blu tack, bubble-wrap, iron & various food etc were used in more experiments to reinfore the concept. 


To end off the lesson, kids were asked to role-play & behave like the objects with differing densities.


Through inquiry-based learning, hands-on experiments & multi-sensorial experiences, key benefits of the program are:

1. Grasp Science concepts to facilitate better appreciation of the environment.

2. Hone Science skills like hypothesizing, observing, evaluating data & drawing conclusions from experiments.

3. Develop critical thinking & problems solving skills by designing experiments & applying Science concepts in real life.

4. Develop systematic thought process by devising experiments step-by-step.

5. Build confidence & communication skills through sociodramatic play & active discussion with peers.

The entire program is organised, well-planned & worth every cent of it!! The teachers were very patient yet firm when dealing with the LOs. Special thanks to Teacher Denise & Teacher Venus for being so accomodating to my super active toddler which kept testing the boundaries & refusing to listen to instructions given..tqvm once again!!!


Disclaimer: Financial compensation was not received for this post. The classes are kindly sponsored by Cognitive Whizz but opinions expressd here are solely BB's & mine ^.~